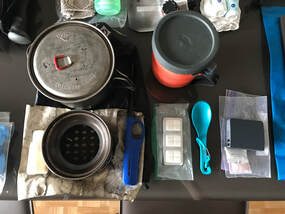
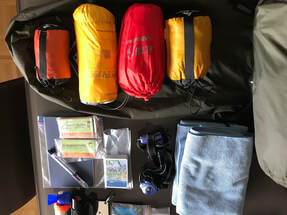
We proceed in this section by category, as outlined in our 'Equipment Checklist'. Each category is described followed by 'Practical Skills' using examples or scenarios to help clarify the use of each piece of equipment.
Food Prep System
|
Depending on the style of trail, the food prep system changes significantly. Choosing to eat cold-soaked (non-cook method) meals or having the opportunity to purchase food as we travel limits the need for a stove and cooking pot. But having a utility knife can come in handy when cutting a delicious hard cheese on a GR in France.
Here are the five elements we consider under food preparation
|
Stoves - Designed to be lightweight and compact, backpacking stoves do not take up much room. These stoves are also fuel efficient. Most backpacking stoves are best for boiling water for dehydrated meals. The best choices are canister stoves, white gas stoves, or wood-burning stoves.
Canister Stoves (Stove and small canister= 490 g) the burner screws onto a pressurised gas canister and mates with a cooking pot. Integrated canister stoves boil water quickly but are not great at simmering. These stoves outperform other stove styles at elevation and in the cold windy environments. It can, however, be hard to judge how much fuel is left in the pressurised canister. Canisters are not refillable and must be packed out and recycled. It can be a challenge finding canisters in remote areas or internationally.
Fuel Stoves (stove and 650 ml container with fuel= 1000 g) White gas and multi-fuel stoves use an external fuel bottle connected to a small folding stove by a short hose. Some models have an adjustable flame that allows simmering. Before cooking, pumping is required to build pressure in the fuel bottle then, priming the stove occurs by igniting a trickle of fuel in the burner. Once the stove is primed, the flame can be adjusted by allowing more, or less fuel through the pressure valve.
These stoves burn white gas, sometimes called naphtha. Some white gas stoves can also burn other types of fuel including kerosene, diesel, unleaded automobile gas or jet fuel (some of these require a different pressure head). These multi-fuel stoves are great for international travel. (Check with the airline for travel regulations)
These stoves are efficient in windy conditions when a windscreen is used. The fuel bottles are refillable and reusable.
|
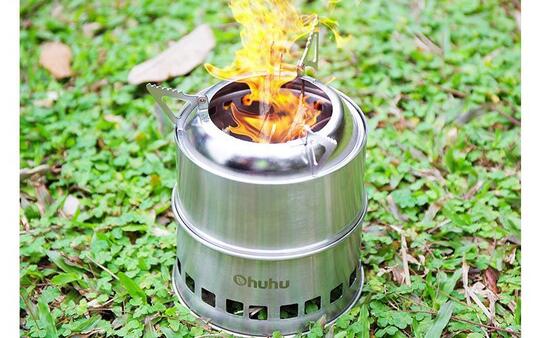
Wood Burning Stoves (200 g) are light weight and use wood (twigs) found in the environment. They do require constant attention to keep the small embers burning. For boiling small amounts of fluid, they work great. But if heating larger amounts of fluid, say one or more liters, they do take more time and effort. For very wet conditions, consider bringing fire-starter tabs. The stove we use is the Ohuhu and can be purchased online for around twenty-five dollars. Some wood burning stoves (found in stores) offer a battery charging mechanism, but these are very heavy and bulky.
Calculation for fuel consumption of certain styles of stoves follows in the Practical Skills section. |
Cooking Pot, Personal Cup, Spoon, and Utility Knife - For solo hikers, the cook pot can do double duty as an eating dish. We often share our meal this way. A 1.5-liter pot weighs around 150 g, whereas a 750-millilitre pot weighs 110 g.
Many hikers make a pot cozy out of insulated foil and fire-resistant duct tape. This cozy is used to save on fuel, by keeping the pot’s content warm during a warm-soak. There are numerous videos on how to make such cozies.
We opt to carry a spill proof cup and lid. This extra item can be used for cold/warm-soaking, having an individual hot drink, and/or electrolyte drink.
We use a titanium spoon (20 g) as our go-to utensil. Forks and butter knives are not necessary. The utility knife has many uses: from cutting kindling for the wood stove, cutting thread or cord, and food prep. We chose a SlimJim knife (75 g). The fold down blade is compact and super-thin.
Food Sack - A waterproof stuff sack (9L=50 g) for all the dried food reduces abrasion tears of the food bags. We like the Ursack (11L=190 g). It is heavier than a regular stuff sack but has the added quality of protecting the contents from rodents and bears as the sac is made of tear proof fabric.
Food Prep System - Practical Skills
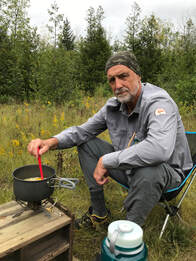
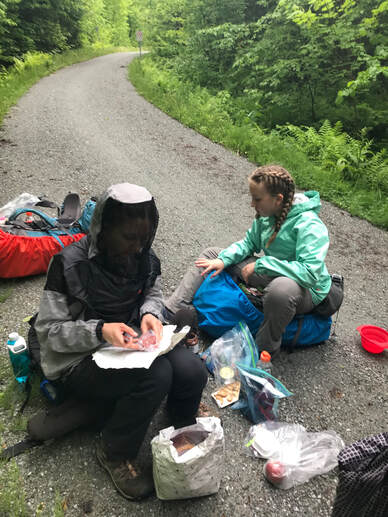
Food Prep - Some thru-hikers choose a non-cook, or cold soak, option and forgo the use of a stove altogether. This can work well in warmer climates but in our experience if the temperatures drop to near freezing, no amount of cold soaking will re-hydrate items such as beans or meats.
|
We chose a non-cook method for the Arizona Trail thru-hike. In the lowlands our meals would have a chance to rehydrate prior to mealtimes. But in the mountains, where the temperatures dropped below freezing, our meals were not as palatable. The beans felt like small rocks and required a lot of crunching to get them down. We suffered from tommy aches due to the dry elements being slowly digested.
|
For the cold-soak method, a spill proof container is needed. Put the dehydrated food and cold water in the container and let it soak while walking. Remember that while cold-soaking, there is additional carry weight due to the fluid content of the meal.
Another technique is the warm-soak. Water and the dried meal are brought to a boil on the stove. The stove is then turned off. The pot is covered, and the meal is left to soak for a one hour. This should be enough time to reconstitute all the dried elements. Some hikers use an insulated cozy for their pot. The cozy holds the heat longer. Depending on the ambient temperature, this may be a useful piece of gear.
Fuel calculation - Rehydrating dehydrated meals will take about a third more time than rehydrating freeze-dried meals. It is important that we take this into consideration when planning how much fuel to bring on our adventure.
|
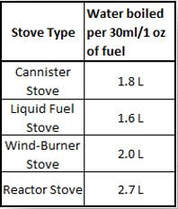
How much fuel will be needed? Solo thru-hikers have an easier time calculating their fuel consumption. For groups, the easiest way to determine consumption is by multiplying the amount of people in the trekking party with the number of hot meals and the number of hot drinks the party is planning on having. This number will give a rough sense of how many liters of fluid will need to be boiled. Once this estimate is calculated, use the chart to determine how much fuel the stove uses to boil one liter of water. Keep in mind that this is a rough estimate. Always bring a bit of extra fuel.
Traditionally stoves are tested at sea level in twenty degrees Celsius with no wind. But these conditions are rarely the case for most treks. Adverse factors such as low temperatures, melting of snow for water, high altitude cooking, and wind can end up requiring three to four times as much fuel as the baseline number. When it comes to altitude, remember that the change from sea level to 3,500 meters (10,000 ft), cook time will double. |
Food Storage - Animals may be attracted to our campsite by the food smells. Maintaining a clean campsite is important to discourage curious animals. A ‘problem’ bear may have to be relocated or killed. This can be generally avoided by good camping practices. Cook, clean, and store all food and toiletries at least thirty meters (100 ft) from the campsites.
Using a bear box for food storage is optimal. They are often provided at campsites in National and Provincial/State parks. In the absence of these metal storage boxes, using a hard-shell bear container is a great option. But they are bulky and heavy. An Ursack is another good option for food containment. The Ursac is made of tearproof material that will minimise the chances of a wild animal getting into the food storage. Hanging a bear sack in trees, when available, is best.
Hanging a Food Sack - Proper hanging of the food bag is important. Here is the gold standard: the bag must be six meters (20 ft) off the ground, 1.5 meters (5 ft) from the tree and 1.5 meters down from the branch. This takes a lot of practice and may not be much of a deterrent for a very stubborn bear or other animals. If no suitable trees are available, the bear sack can be tied down to smaller trees or other natural formations away from the campsite.
Hydration System
Water weighs one kilogram (2.2lbs) per liter; expect to drink three to six liters a day (or more) depending on the physical effort and the environment (temperature, elevation, humidity). Be mindful of where the next water source is located. How much water is needed to reach the next water source? Remember additional water is required to rehydrate and cook the meals. This questioning will help assure that enough water is available for hydration and cooking, but the carry load is kept at a minimum.
- Water bottle, water bladder (Platypus)
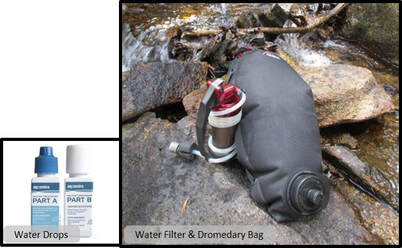
- Water Treatment System: Filter with cartridge, UV purifier, and/or chemical drops
Water containers - Many thru-hikers use one-liter bottles (50 g) to carry their water. These are usually recycled bottles. They are light and durable. When they deteriorate, they are easily replaced by buying new water bottles at a grocery store.
We prefer water bladders (3L Platypus= 180 g) with a wide zip-lock mouth and sipping tube. They come in one, two, or three-liter sizes. We strictly use them for water. They are cleaned regularly with chlorine tabs, and the mouthpiece is washed with soapy water. For flavoured drinks, we use our lidded cups.
The reason we prefer bladders is that they allow us to sip fluids regularly. This permits us to remain hydrated while walking and we find that overall, we drink more during the day. The wide Ziplock openings make filling the bladder easier.
Water Treatment - Tap water in foreign countries can be safe to drink, or not. Research prior to leaving for the trip. If there are questions on the safety of tap water, always err on the side of caution and have a purifier system.
Water treatment is important in maintaining our health in the outdoors. Not all water sources are unsafe, but even the most pristine-looking source can make us sick. If livestock, wildlife, or humans can reach an area, so can contaminants from their fecal matter. Boiling water for over five minutes will kill bacteria and viruses. But it takes time and fuel.
We anticipate that bacteria, viruses, and contaminants may be present in all natural water sources. The different types of water filters and water purifiers require different treatment method, and different time for water to be ready to drink. When treating water from a murky source, it is worth carrying a pre-filter to prevent the filter from clogging up. There are pre-filters available, but a clean cotton handkerchief works well and is inexpensive. And finally, know water treatment best practices. Even the best filter or purifier is not effective if basic hygiene and usage guidelines are not followed.
We met Strider on the trail. She had filtered her drinking water but had rinsed out her cup in the stream. The cup was now contaminated with whatever bacteria was in the stream. We found out later that she had been ill with diarrhea and had to exit the trail. Understanding basic hygiene guidelines could have kept her healthy and on the trek.
Water filters - (140-150 g) work by physically straining out protozoan cysts (such as Cryptosporidium and Giardia lamblia) and bacteria (such as E. coli, Salmonella, Campylobacter and Shigella). These biological pathogens are the main water concerns when traveling in the U.S. and Canada.
Water purifiers - also combat viruses, which are too tiny for most filters to effectively catch. When traveling in less-developed areas of the world, consider products that also provide protection against viruses (such as hepatitis A, rotavirus, and norovirus).
Every filter and many purifiers include an internal element or cartridge, a component that has microscopic pores that catch debris, protozoa, and bacteria. Over time, strained matter plugs up an element’s pores, requiring it to be cleaned and eventually replaced.
|
On the Arizona trek, some of our water sources were very muddy ponds. Our cartridge filter got plugged and became unusable. Luckily, we had aqua drops as a back-up.
Most purifiers use chemicals (such as iodine) (110 g) to kill viruses, which are too small for most filter elements. Another purification method relies on ultraviolet light (145 g) to kill the pathogens.
|
The summary above covers the basics for each treatment method, but innovation has produced hybrid designs and many unique products.
Remember that we are also part of the environment, and our actions can affect others using the water sources. Always move away from a water source to clean or wash. Never use soap directly in a water source. As well, camp and defecate at least sixty meters (200 ft) away from any water source.
Remember that we are also part of the environment, and our actions can affect others using the water sources. Always move away from a water source to clean or wash. Never use soap directly in a water source. As well, camp and defecate at least sixty meters (200 ft) away from any water source.
Shelter System
Tents and shelters are expensive, so it is best to consider the options prior to committing to a certain style. When researching shelters, consider the season rating, dimensions, and weight.
Tents are designed to withstand inclement weather. The season ratings refer to the stability of the construction of the shelter and its capacity to withstand winds, storms, and snow. Three-season tents are good for just that, three seasons. During the trek, if winter conditions could be encountered, a four-season tent is the best option.
Tents are designed to withstand inclement weather. The season ratings refer to the stability of the construction of the shelter and its capacity to withstand winds, storms, and snow. Three-season tents are good for just that, three seasons. During the trek, if winter conditions could be encountered, a four-season tent is the best option.
|
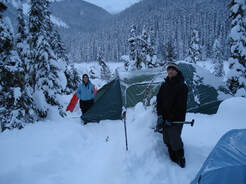
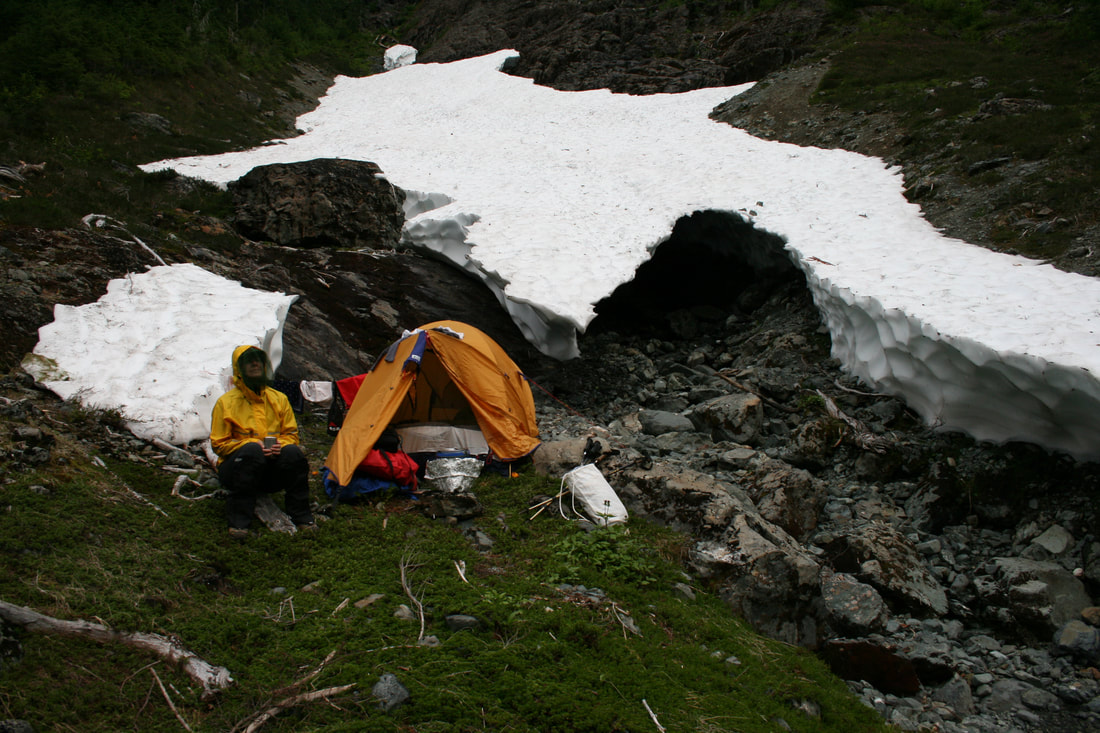
We encountered a snowstorm while camping, late in the season, in the coastal mountains of BC. We woke up to find our tent completely covered in a thick layer of wet snow. We went out to check on our friends and found one of their tents had collapsed. This tent was a three-season tent and did not have the structural strength to withstand the weight of the snow. The occupant, and all his gear, were soaked. In the morning, we voted to exit the trail as this person no longer had dry clothing to keep him warm.
|
There are three main choices of fabrics when looking at backpacking tents and shelters. Silicone impregnated Nylon, Silicone impregnated Polyester, and Dyneema Composite Fabric (DCF), formerly known as Cuben fiber. There are minor variations of different weaves or blends of these materials, and all come in different thicknesses. All three materials are durable and comparable.
Sil-Nylon is a lightweight, and inexpensive material. It is a bit heavier than DCF. The Sil-Nylon shelters typically need to be readjusted sometime after setting up, and when they are wet, as the material stretches, and the shelters tend to sag.
Sil-Polyester is a lightweight, and affordable material. It does not tend to stretch in the same way as the Sil-Nylon. It is a bit heavier than DCF.
DCF- Dyneema Composite Fabric is the lightest option today. It does not stretch, and so shelters do not need to be readjusted. DCF is often laminated with polyester to improve abrasion resistance. The thinner the material, the lighter the weight but the less durable. Different thicknesses are used depending on the application. For Instance, thicker materials are usually used for backpacks and possibly tent bases. Thinner materials are used for shelter walls and rainflies. The disadvantage is the cost.
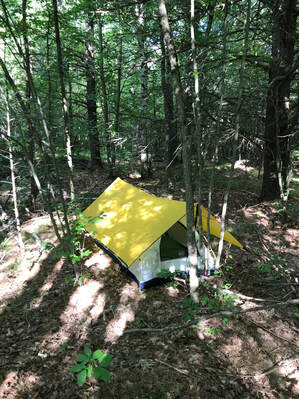
The Traditional Tent Styles - (3-4 seasons/2-person 2000 g) include collapsible poles that form a frame on which the tent and rainfly are held. The number of poles relate to the stability, and season rating, of the tent. The higher number of poles, the sturdier and more stable the tent is.
The two-layer system, tent body and rainfly, helps reduce condensation and improve impermeability in inclement weather. Tent bodies incorporate a base, or bathtub floor, and mesh walls, or a base and fabric walls with zippered mesh windows for ventilation. The mesh walls are great for warm weather. But if cold temperatures are anticipated, having the ability to close the mesh windows may be a better option. The mesh bodies are, of course, lighter weight then the fabric walls with zippered mesh windows.
These traditional shelters boast being free standing. While the main body of a freestanding tent stands on its own, without stakes, it is still better to stake it out. A tent can move a considerable distance in strong winds, sometimes resulting in tent damage and lost gear. The rainfly needs to be staked out to create the vestibules.
Some shelter bases are made of a sturdier material that can withstand humidity and friction of rough ground. The lighter material bases often require a ‘groundsheet’. This groundsheet protects the base but is an additional item that, again, weighs more.
If this option of shelter provides more flexibility for the trekking style, consider each component, its use and weight. We have a great four-season tent with a sturdy base. We never use a groundsheet. We often use the tent body without the rainfly component. This reduces the weight by four hundred grams (1 lbs). In its stead, we use an ultra light tarp that we setup using our walking poles. The trap weighs less than two hundred grams (0.4 lbs). It provides great air flow and is waterproof.
Hammocks - (1150 g) are shelters that hang from trees. Getting the hammock securely strapped to the trees, at the desired level of tension is key and can take time and practice.
Consider all the components needed to complete the shelter: rain cover, bug mesh, and body of hammock. These shelters have a weight capacity, so make sure that the selected model will carry body weight, gear, and a bit extra.
One of the biggest problems with hammock sleeping is the cold or a lack of insulation. Being completely exposed to the circulating air below and above wicks body heat away from the occupant. If backpacking beyond the warm summer season, adding extra insulation such as a sleeping pad may be prudent.
The last consideration is the set-up. Will there be suitable trees on the trek? In some areas, trees are dwarfed due to altitude, or limited growing seasons. Lacking trees, the hammock quickly becomes a bivy!
Types of Ultralight Backpacking Shelters - There are many different types of ultralight backpacking shelters. They typically shave weight by not using collapsible poles and utilising lighter fabrics. If no hiking poles are used, the manufacturers sell poles separately for the tent set up. Their size is usually smaller than the traditional tents. Consider the dimensions of the shelter. As well, look at the fabric of the base or floor. Some of these shelters may need a groundsheet, or bug netting to fully protect the occupant. The shelter needs to protect the occupant from those blood thirsty monsters, or madness will ensue!
|
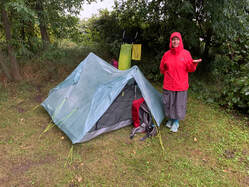
Single Wall Ultralight Tents (2 person= 600 g) are “all in one” shelters. They offer complete rain and bug protection and a built-in floor all in one piece. Most of these ultralight tents use trekking poles in their setup and avoid carrying the extra weight of tent poles. These shelters offer a sense of security as the occupant is fully enclosed from the environment. They are typically easy to set up, even solo. But because of the one-layer system, they tend to gather condensation that can drip onto the occupant.
|
|
The basic tarp which we added to our bivy approach for bad weather |
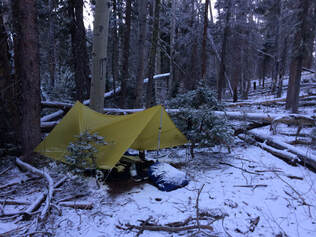
Flat/Shaped Tarps (350 g) are rectangular, or shaped, sheets of waterproof material that can be pitched to provide protection against the rain and wind. They do not have floors or bug protection. They are extremely lightweight and versatile. The occupant will feel more exposed due to the open design, and some bug protection and ground sheet could be added for more protection against the elements. This, again, adds weight.
|
|
Bivouac, or Bivy, Sacks and Bug Nests
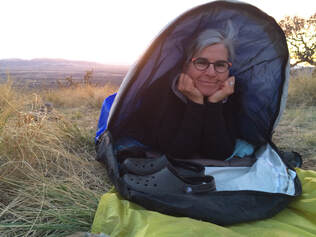
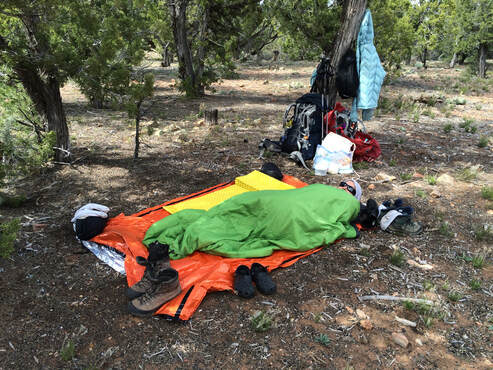
Bivy Sacks (200 g) comprise of a “tube style” shelter similar in shape to a sleeping bag. They use waterproof materials and bug mesh that the occupant slides into with their sleep system. They usually have a zippered entrance on the top or side. Some styles have small poles to lift the bivy away from the occupant’s head when lying in the bag. Bivies can add additional warmth to the sleeping arrangements. |
On the AZT, we chose bivy bags as our shelter system. Bugs were not a concern in the deserts of Arizona. We could set-up camp and hang out in the shade of a tree until bedtime. The bivies were perfect. Lightweight, waterproof, and warmer than our traditional tent, they offered the best option for a shelter system on this trek.
Bug Nests (100 g) are hung from the inside of the tarp, some include a waterproof floor but not all. Those with floors usually have a zippered door. Many bug nests only work with a specific tarp/tent style to make a complete shelter system.
Groundsheets for Ultralight Backpacking Shelters - Many ultralight backpacking shelters require a waterproof groundsheet (75 g). They can be used underneath a single wall tent for extra protection or with a tarp when there will not be any bugs or heavy rainfall. They are lightweight and affordable. They can work with any kind of shelter and different sizes are available. They come in a variety of materials: Syl-nylon, Tyvek, and Polycro or Polycryo. Polycro/Polycryo is the lightest possible option, but it is harder to work with and some wrestling may be required to get it to lay flat. The material is, however, durable.
Stake choice is something that should not be overlooked. Some shelter systems come with light stakes. They can work well enough but good quality; smartly designed stakes will make setting up the tent easier. Good stakes make tent pitching faster and more secure. For pitching in rocky ground and other difficult areas, chose Y shaped or square shaped stakes made of titanium or similar material. They have an increased surface area and have great holding power. They weigh about ten grams each (0.4oz).
We were so excited when our Z-Pack tent arrived in the mail. It came with light stakes. But after our first night of camping on hard ground, the heads of the stakes were damaged from our pounding them into the rocky ground. We replaced them with rectangular stakes that withstood the bashing required by the terrain.
The shepherd-hook styles are great when less holding power is required, and weight is a strong consideration. These hooks are tough and are suitable in most scenarios. It is possible to bend them so caution must be taken, but the weight savings are significant, and generally do a good job. They weigh six grams each (0.2oz).
SHELTER SYSTEM - Practical Skills
Campsite Selection - While catalog photos of tents show a picturesque lakeshore with a tree, this is not the reality for most distance treks. It is best to consider the terrain, bugs, and weather prior to setting-up the tent. Taking some time to scout for a good camp may save hours of misery. Chose a flat area that is well drained whenever possible. Clear away rocks and branches from the tent site. Look around for potential hazards such as poison ivy, dead trees, ants, or wasp’s nest.
Mosquitoes and other flying insects are predictable. They like wet areas with little to no wind. Try to avoid camping near wet and boggy areas. Instead look for higher and drier ridges or other well drained areas that will have less bugs. Stand around in the prospective campsite for a few minutes before pitching the tent. If the insects are going to be bad, it will be obvious in a few moments. If it is not windy, try to find a place that gets the most air movement, with fewer trees or shrubs. This will take advantage of even slight breezes.
Mosquitoes and other flying insects are predictable. They like wet areas with little to no wind. Try to avoid camping near wet and boggy areas. Instead look for higher and drier ridges or other well drained areas that will have less bugs. Stand around in the prospective campsite for a few minutes before pitching the tent. If the insects are going to be bad, it will be obvious in a few moments. If it is not windy, try to find a place that gets the most air movement, with fewer trees or shrubs. This will take advantage of even slight breezes.
|
In some terrain and in certain seasons, bugs cannot be avoided. This is when, the proper choice of shelter system will protect the hiker fully, and perhaps provide a bit of extra room for those hours spent resting inside the shelter before bedtime.
Keep in mind that trees block the wind. They lower wind load and stress on the shelter and tent stakes. Trees prevent radiant heat loss as they reflect the day’s heat back to the ground at night in the same way that a cloudy sky makes it warmer overnight. Camping in the trees is also less prone to the heavy dew and condensation of exposed campsites. The worst place for dew is in a treeless meadow at the bottom of a canyon. Trees provide shelter anchors for tarps and tie-outs. Just a few good tie-outs to trees will make any tent more stable. Finally, make sure that the tent is not in an area where water will pool-up or stream through. This is far better than relying on the tent floor to be 100% waterproof. |
We thought we had lucked out when we spotted a round, flat area, bare of the surrounding vegetation. We set-up camp. Later that night, a storm blew in with high winds and heavy rain. Our flat spot turned out to be a dry pond. It was now filling up with water. Our tent and sleeping bags got progressively wetter through the night.
|
Leave No Trace (LNT) Ethics
Leave No Trace Ethics suggest camping discreetly and out of sight. This is a favor to fellow backcountry travelers sharing the area. This way everyone can view the beautiful scenery. In addition, try and camp on hard, durable surfaces whenever possible. This reduces potentially crushing delicate plant life. Keep the campsite clean. Toileting and cooking far from water sources and from the campsite will reduce water contamination and unwanted wildlife encounters. Carry out all trash. If close to the next community, consider carrying out other camper’s trash. Resist the urge to build a campfire. This can be dangerous and mares the terrain, leaving a black mark for others to find. |
Sleeping System
At the end of a long day walking, we look forward to laying down on our sleeping pads. The pad protects us from the hard, cold ground. As well, having the right sleeping system for the temperatures is key in having a restful night’s sleep.
- Sleeping pad (550-1000 g)
- Sleeping liners, bag, or quilt (230-1150 g)
Sleeping Pads
Sleeping pads fall into three general categories: self-inflating, air and, closed-cell foam.
Self-Inflating Mats (1000 g) incorporate foam in an inflatable pad. This technology was developed in the 1970’s and most of today’s self-inflating pads have not deviated much from this design. Compared with air pads, self-inflating options are more puncture resistant, and still have some semblance of padding, if it deflates in the middle of the night. The downsides are that the foam brings extra weight, and they are bulkier. Ultra-light options are quite thin, leading to complaints from side sleepers.
Air Pads (550 g) offer unmatched compactness, often folding down to the same size as a Nalgene bottle. They are also the lightest option, while at the same time providing unmatched thickness. Bonded insulation or baffling techniques can bring impressive warmth. The primary downside for this type of pad, is a greater puncture risk. Bringing along a patch kit should alleviate most concerns.
Foam closed-cell Pads (550 g) are the oldest design but are still a dependable option. They are the least comfortable option, do not pack as small, and do not have the highest R-values (insulation rating), but they also have exactly a zero percent chance of deflating in the middle of the night.
Comfort is relative when sleeping on the ground. Sleeping pads are thin, but the latest outdoor gear technology has made advances in comfort and R-value. Sleeping position is important to consider. Back sleeping distributes body weight more evenly, whereas side sleeping puts a higher percentage of weight around the hips and shoulders. For side sleepers, consider more cushioning options. Adding a short closed-cell pad under the torso may make a significant difference in comfort.
A critical specification in comparing sleeping pads is R-value, or how much insulation a pad provides from the ground. Do not underestimate R-value: using an uninsulated or too lightly insulated pad even in cool temperatures will allow cold to seep through the pad throughout the night. A warm and thick sleeping bag will not help as the body compresses the insulation along the bottom of the bag, thereby letting cold air up and compromising its ability to retain warmth.
In terms of recommended ranges,
Most sleeping pads are unisex and come in two or three sizes that allow choices based on height and comfort preferences. A “regular” pad often is right around 183cm (72 in) long and 51cm (20 in) wide (at its widest point). The “large” often is between 195 to 205 cm (77 and 80 in) long and 64cm (25 in) wide.
In terms of shape, they fall into two basic categories: mummy pads that taper towards the feet to reduce weight, and rectangular pads that are more spacious and accommodating for comfort-minded or active sleepers
Occasionally a “small” size is available. Some brands offer torso pads that are only about 2/3 the length of a regular pad. These are not as comfortable, but they do cut significant pack weight. Because legs have fewer contact points with the ground, consider placing an extra piece of gear under the feet for cushioning and warmth.
Some sleeping pads also come in a women’s version. They are shorter than the unisex pad, 168cm (66 in). They also may offer a little more insulation, making them a great choice for all shorter adults who sleep cold. Some models as well, adjust the dimensions and concentration of foam around the hips for greater room and comfort.
Sleeping pads fall into three general categories: self-inflating, air and, closed-cell foam.
Self-Inflating Mats (1000 g) incorporate foam in an inflatable pad. This technology was developed in the 1970’s and most of today’s self-inflating pads have not deviated much from this design. Compared with air pads, self-inflating options are more puncture resistant, and still have some semblance of padding, if it deflates in the middle of the night. The downsides are that the foam brings extra weight, and they are bulkier. Ultra-light options are quite thin, leading to complaints from side sleepers.
Air Pads (550 g) offer unmatched compactness, often folding down to the same size as a Nalgene bottle. They are also the lightest option, while at the same time providing unmatched thickness. Bonded insulation or baffling techniques can bring impressive warmth. The primary downside for this type of pad, is a greater puncture risk. Bringing along a patch kit should alleviate most concerns.
Foam closed-cell Pads (550 g) are the oldest design but are still a dependable option. They are the least comfortable option, do not pack as small, and do not have the highest R-values (insulation rating), but they also have exactly a zero percent chance of deflating in the middle of the night.
Comfort is relative when sleeping on the ground. Sleeping pads are thin, but the latest outdoor gear technology has made advances in comfort and R-value. Sleeping position is important to consider. Back sleeping distributes body weight more evenly, whereas side sleeping puts a higher percentage of weight around the hips and shoulders. For side sleepers, consider more cushioning options. Adding a short closed-cell pad under the torso may make a significant difference in comfort.
A critical specification in comparing sleeping pads is R-value, or how much insulation a pad provides from the ground. Do not underestimate R-value: using an uninsulated or too lightly insulated pad even in cool temperatures will allow cold to seep through the pad throughout the night. A warm and thick sleeping bag will not help as the body compresses the insulation along the bottom of the bag, thereby letting cold air up and compromising its ability to retain warmth.
In terms of recommended ranges,
- Summer-only treks can fair well with an R-value of three or less.
- Three-season treks, the R-value should be around three to five.
- Winter camping requires an R-value that exceeds five. If camping on snow, it is a good idea to bring a combination of pads.
Most sleeping pads are unisex and come in two or three sizes that allow choices based on height and comfort preferences. A “regular” pad often is right around 183cm (72 in) long and 51cm (20 in) wide (at its widest point). The “large” often is between 195 to 205 cm (77 and 80 in) long and 64cm (25 in) wide.
In terms of shape, they fall into two basic categories: mummy pads that taper towards the feet to reduce weight, and rectangular pads that are more spacious and accommodating for comfort-minded or active sleepers
Occasionally a “small” size is available. Some brands offer torso pads that are only about 2/3 the length of a regular pad. These are not as comfortable, but they do cut significant pack weight. Because legs have fewer contact points with the ground, consider placing an extra piece of gear under the feet for cushioning and warmth.
Some sleeping pads also come in a women’s version. They are shorter than the unisex pad, 168cm (66 in). They also may offer a little more insulation, making them a great choice for all shorter adults who sleep cold. Some models as well, adjust the dimensions and concentration of foam around the hips for greater room and comfort.
We are generally careful with our gear. Unfortunately, Simon’s self inflating mat was punctured by a cactus needle, within the first week on the AZT. At our next resupply stop, he purchased a closed-cell foam pad. This pad was more suited to the rough desert environment.
Sleep system - Practical Skills
|
Sleeping Pad Care - To store a self-inflating pad in the offseason, make sure to leave it unrolled and the valve(s) open. By doing this, it will keep the foam in good condition. If it is stored compressed, the pad will lose its self-inflating nature because the foam will become overly compacted.
Air pad storage and care is a little simpler. Remove all the air from the pad and keep it rolled up in its storage bag to protect it from punctures. As for caring for a closed-cell foam pad do not leave heavy objects on top of it to avoid undue compressing of the foam. Sleeping Bags Silk Slips (165 g) are used when sleeping in hostels where there may be bed-bugs. They are light weight and offer little insulation against the cold. They may be all that is needed when walking a hostel trek in warm climates. If additional warmth is needed, there are warmer sleeping bag liners (230 g) available. |
The list below describes sleeping systems with summer ratings. There are, of course, winter rated systems that will be bulkier and heavier.
The mummy bags (-5C= 1150 g) are the standard design most campers will be familiar with. They are narrow at the feet, wider at the shoulders, and have a hood around the head to keep the occupant warm.
Ultralight sleeping bags (-5C= 570 g) have a similar design to mummy bags, but these lightweight bags streamline their design even more with thinner shell materials, higher-fill-power down, half-length (or shorter) zippers, and smaller dimensions. Some ultralight bags even drop the hood and zipper altogether for a tube-style design that offers exceptional warmth for weight.
With sleeping bags, there is a draft-free, fully enclosed sleep environment that keeps warm air in and cold air out, allowing the for maximum insulation.
Down Quilts (-5C= 650 g) are ultralight and ideal for hot sleepers, warmer climate treks, or sleeping in hammocks. The quilt removes the hood and back (but not the foot box) from a traditional mummy bag, offering insulation only on the front and sides of the body. Quilts known as “top quilts” simply drape over the body, whereas most designs come with sleeping pad attachments to create a closed system with the sleeping pad. Some quilts have a foot box that closes shut with a zipper, or snaps, and a bottom drawstring. This gives the versatility of using the quilt as a blanket.
Performance Considerations
Ultralight enthusiasts are always looking at weight and packability for ways to shave weight and bulk from their packs. With less material and neither a hood nor zipper, quilts cut all superfluous features from a sleeping bag in the hopes of dropping a bit of weight.
In terms of temperature regulation, both sleeping bags and quilts have their strengths and weaknesses. On a cold night, the ability to zip the sleeping bag fully, cinching the baffled collar close, and snugging the hood around the head is key to retain body heat. And on a warm night, a bag with a full zip can turn into a pseudo-quilt by undoing the zipper all the way and draping it over the body. However, in some ultralight bags, with a zipper-less or partial-zip model, there is a risk for overheating on a warm night.
Backpack system
- Backpack (750-1500g)
- Rain Cover (60l = 105g)
- Waterproof Stuff Sacks (30l = 70g) or Garbage Bag Liners (30l = 30g)
Most packs are water resistant but not waterproof. Some fabrics such as, Dyneema composite, are totally waterproof. Depending on the style of pack chosen consider adding a rain cover and/or waterproof stuff sacks to keep all gear dry. Rain covers protect the outer aspect of the pack whereas waterproof compression bags or large plastic garbage bags, inside the backpack, protect its content.
The choice of a backpack will relate to the choices made for the rest of the camping gear. There are a few key considerations when choosing a pack. We recommend doing research prior to committing to a specific model or style.
Backpack capacity typically range from thirty to seventy liters or more. Most people will need forty-five to sixty liters for an extended hike. Understand the volume of gear prior to purchasing a pack.
For Comfort and fit consider comfort versus moving fast and light. The extra padding on some backpacks can reduce the bruising on the shoulders and hips that can occur on extended treks. Proper fit will also greatly affect the comfort. A pack that is too small or too large can cause friction blisters that will be very painful. Make sure the chosen style of pack is fitted by a knowledgeable store clerk, or experienced hiker.
The Gear and Hiking Style category refers to the carry weight. When carrying over nine kilograms (20 lbs) as a base weight, a sturdier pack is required. A 4.5 to seven-kilogram base weight (10-15 lbs) will require a mid-weight pack (45L= 845 g). Less than 4.5 kilograms (10 lbs) base weight may allow the option of a smaller capacity, frameless pack (35L= 650 g).
|
So which pack is right? The temptation to going ultralight is ever present. But if the hiking style and pack load are not conducive to a thirty-five-liter frameless pack with no hip belt, misery will ensue! That said, the weight of a seventy-liter, fully-padded pack can be around 2.5 kilograms (6 lbs) empty! While these packs are great for carrying heavy loads, we encourage minimising the carry weight. In this way, the mid-size pack option will work. These packs have enough features and suspension to carry around fourteen to sixteen kilograms (30-35 lbs) comfortably, but without the beefy buckles, memory-foam hip belts, and enormous capacity to bring the base weight too high for happiness.
|
We have removed the additional straps from our packs. The divider between bottom and top section of the body of the pack can be easily removed without affecting the structure of the pack. Are there any cinching straps or add-ons that can be cut away? Make sure that removing these straps will not affect the structural integrity of the pack. Do not remove chest straps, stabiliser straps, or hip and shoulder straps. These are important for comfort adjustments. Also, some hikers remove the lid, or brain, of the pack. This top portion can be useful to carry quick access items but is easily removed by unclasping the straps.
BackPack System - Practical Skills
Packing your backpack
Packed efficiently, a backpack can swallow an amazing array of gear. The following are our suggestions of what goes where. Having an efficient packing system saves time at camp, but also during the day. Those frequently used items thoughtfully stored, in easy to reach pockets, reduce the frustration of having to unpack along the trail. Remember that a well-loaded pack will feel balanced when resting on your hips and will not shift or sway while hiking. There is no one right way to pack. We recommend laying out all the gear at home and trying out different loading routines.
Packing can be broken down into three zones, plus peripheral storage: the bottom zone, the core zone, and the tops zone (or the brain).
The bottom zone is good for bulky gear and items not needed until camp such as a sleeping bag, sleeping pad, and/or camp shoes. Packing this soft gear at the bottom also creates an internal shock-absorption system for our backs and our packs.
The core zone is ideal for denser, heavier items such as food stores, cook kit, and water bladder. Remember that trying to slip a full water bladder into a full pack will not be easy. Even if it has a separate compartment, it is best to fill the reservoir and put it in the pack first.
Packing heavy items in the core zone helps create a stable center of gravity and directs the load downward rather than backward. Placed too low, heavy gear causes a pack to sag; placed too high, it makes a pack feel tippy. Make sure that the fuel-bottle cap is tight. Pack the bottle upright and place it below (separated from) the food in case of a spill. We always store our fuel containers in a sturdy Ziplock bag for added precaution against spills.
Consider wrapping soft items around bulky gear to prevent shifting. Use these soft items to fill in gaps and create a buffer between bulky items and the water bladder: these include the tent body, footprint, rainfly, tarp, and extra clothing.
The top zone is good for bulkier essentials needed on the trail such as a warm layer, raincoat, first aid kit, or water filter. Some people also like to stash their tent rainfly or trap at the top of the pack for fast access if stormy weather moves in before the camp is setup.
The top, or brain, of the pack, if there is one, is good to store other small quick access items. These may include mosquito nets, warm hat and gloves, sunglasses, headlamp, and rain cover for the pack.
|
The accessory pockets are good for essentials that are needed urgently or often such as water bottles, pack rain cover, or snacks. The tool loops and lash-on points are good for oversized or overly long items such as tent pole, some sleeping mats, or hiking poles. Daisy chains, lash patches and compression straps can also be used to wrangle gear that simply cannot be carried in any other place.
Because this gear can snag on branches or scrape against rocks, minimize how many items are carried on the outside of the pack. Some friends joined us for a section walk on the Trans Canada Trail. On day one, when we stopped for a few breaks, they had to dig into their packs to find a warm layer, their snacks, sun hat, etc. Ten-minute breaks became twenty-minute breaks simply because of the added unpacking and repacking of their bags. This was frustrating and energy sapping. With a few adjustments, they became proficient with packing, and this time was dramatically reduced.
|
How to Hoist Your Loaded Pack
Follow these steps and smoothly hoist even a heavily loaded pack from the ground onto your back:
Once shouldered, the pack can be adjusted using the straps for the hip and shoulders. A good tip is to loosen the shoulder and hip straps prior to removing the pack. In this way donning the pack again will be easier.
Pack Straps
The Sternum (chest) strap helps disperse the weight of the backpack off the shoulders. Its main purpose is to prevent the shoulder straps from sliding off the arms, allowing more freedom of movement.
The Load-lifter straps (or sometimes called stabilizers) located on the top of the shoulder strap, also relieve the shoulders from some of the weight of the backpack by bringing the bag forward and bringing the center of mass inward. These straps can be used when walking up or down steep inclines. When cinched (or released), the top of the bag will move closer (or farther) from the shoulders assisting in maintaining a proper center of gravity.
Aside from these, there is the waist (hip belt). It is also used to relieve the back from the weight of the pack. Ideally, the waist belt should be padded and sit directly on the top of the hip bones (women) or just above it (men). Packs with small waist belts, that have no padding, strictly keep the bag from swinging around and do not offer much in terms of weight distribution.
Additional stabilizer straps can sometimes be found on the waist belt. Like the load-lifter straps, these straps pull the backpack closer and improve balance by bringing the center of gravity closer to where it would naturally be.
Shifting the tension from the shoulders to the hips transfers the weight of the pack to the hips and legs. For women, or individuals who have most of their muscular strength in their legs, it is best to maintain the hip strap tight to keep the pack weight on the lower body.
Shifting the stabiliser straps will help adjust the weight of the pack during the day depending on the trail condition. Practice adjusting these straps to become familiar with the functioning of your pack.
Follow these steps and smoothly hoist even a heavily loaded pack from the ground onto your back:
- Loosen all the straps slightly to make the pack easier to slip on.
- Tilt the pack to an upright position on the ground.
- In a wide legged, bent knee stance, stand next to the back panel.
- Grab the haul loop (the webbing loop at the top of the back panel on the pack).
- Lift and slide the pack up onto one thigh and let it rest; keep one hand on the haul loop for control.
- Slip the other arm and shoulder through one shoulder strap until that shoulder is cradled by the padded strap.
- Lean forward and swing the pack fully onto the back. Now slip the second hand, that was holding the haul loop, through the other shoulder strap.
- Buckle up and make the usual fit adjustments.
Once shouldered, the pack can be adjusted using the straps for the hip and shoulders. A good tip is to loosen the shoulder and hip straps prior to removing the pack. In this way donning the pack again will be easier.
Pack Straps
The Sternum (chest) strap helps disperse the weight of the backpack off the shoulders. Its main purpose is to prevent the shoulder straps from sliding off the arms, allowing more freedom of movement.
The Load-lifter straps (or sometimes called stabilizers) located on the top of the shoulder strap, also relieve the shoulders from some of the weight of the backpack by bringing the bag forward and bringing the center of mass inward. These straps can be used when walking up or down steep inclines. When cinched (or released), the top of the bag will move closer (or farther) from the shoulders assisting in maintaining a proper center of gravity.
Aside from these, there is the waist (hip belt). It is also used to relieve the back from the weight of the pack. Ideally, the waist belt should be padded and sit directly on the top of the hip bones (women) or just above it (men). Packs with small waist belts, that have no padding, strictly keep the bag from swinging around and do not offer much in terms of weight distribution.
Additional stabilizer straps can sometimes be found on the waist belt. Like the load-lifter straps, these straps pull the backpack closer and improve balance by bringing the center of gravity closer to where it would naturally be.
Shifting the tension from the shoulders to the hips transfers the weight of the pack to the hips and legs. For women, or individuals who have most of their muscular strength in their legs, it is best to maintain the hip strap tight to keep the pack weight on the lower body.
Shifting the stabiliser straps will help adjust the weight of the pack during the day depending on the trail condition. Practice adjusting these straps to become familiar with the functioning of your pack.
hiking poles
There is a debate whether hiking poles are worth taking along on a long trek. If the shelter system uses poles, hiking poles will play two roles and be worth their weight. We also use the pole strap as a tripod for our smartphones when taking group pictures or videos.
It has been shown that using them reduces the accumulated stress on the feet, legs, knees and back by sharing the load more evenly across the whole body. This is especially true when carrying a heavy pack. Used properly, they improve power and endurance when walking uphill. They aid in balance on uneven trails and improve posture, making the walker more upright.
Most walking pole manufacturers offer guidelines as to the correct pole height. Poles can be set longer for descending and shorter for ascending. As a rule, the poles should be set to a length that allows the user’s hands to lightly grip the handle while their forearms remain somewhat parallel to the ground and bent at the elbow.
The straps make a useful addition to the poles and allow walking with a looser grip and a more relaxed style. To make best use of the straps, the hands are slipped up through the strap then the hands grasp the strap attachment and the handle of the pole. In this way, when pressure is applied downward to propel the walker forward, the pressure is transferred not from the tight grip onto the pole handle but onto the wrist and strap.
When planning a trip abroad, make sure the poles are shortened or folded up while travelling. They should be inside a travel bag for airplane travel. Check with the airline as most will not allow poles to be taken into the cabin.
Accessories
These next items are important to consider for the long-distance adventures. At some point, we may get lost or injured. Carrying minimal gear and hopping for the best is not a wise alternative. Over the years, we have met many unprepared hikers injured or simply lost. Often their trip was compromised (or over), and ours was put in jeopardy while we assisted them. We strongly believe that we need to be informed and prepared to face the risks of our chosen sport.
Navigation
Our mountaineering background leads us to consider this gear component important. Finding our way in the wild does not necessarily require expensive navigation tools. A compass and a map are generally all that is required. A hand-held GPS or a smartphone App can also be useful. Having a redundancy in orienteering equipment is important. While modern day technologies, such as the smartphone Apps are great, they are entirely depend on batteries.
Navigation on any distance trek requires constant attention. Getting lost, or missing a turn will lead to added walking, or worst, getting lost, and possibly needing to be rescued. On popular hostel treks, the way is well marked. It is the responsibility of the hiker to pay attention to the markers, and check the GPS, phone App, and/or trail book/map when in doubt. On a guided trek, the guides will make sure the hikers stay together, and follow the trail.
Navigation
Our mountaineering background leads us to consider this gear component important. Finding our way in the wild does not necessarily require expensive navigation tools. A compass and a map are generally all that is required. A hand-held GPS or a smartphone App can also be useful. Having a redundancy in orienteering equipment is important. While modern day technologies, such as the smartphone Apps are great, they are entirely depend on batteries.
- Trail Map and Compass (175 g)
- Handheld GPS, batteries (220 g)
- Smartphone App
- INREACH devices (150g - becoming very popular)
- SPOT device and membership account (220 g)
Navigation on any distance trek requires constant attention. Getting lost, or missing a turn will lead to added walking, or worst, getting lost, and possibly needing to be rescued. On popular hostel treks, the way is well marked. It is the responsibility of the hiker to pay attention to the markers, and check the GPS, phone App, and/or trail book/map when in doubt. On a guided trek, the guides will make sure the hikers stay together, and follow the trail.
Wilderness treks can offer a chance for self-reliance and challenging our navigational skills. We recommend taking an orienteering/navigation course. Having the ability to read a map and find our way is crucial for safety on any wilderness trek.
The Global Positioning System (GPS) makes it possible to locate our geographic position to within a few meters (yards) anywhere on earth. For the wilderness adventurer, it has proven a lifesaver many times over. Handheld GPS receivers are designed to be rugged, able to survive and function in severe conditions, and available at outdoor recreation and marine stores.
GPS is not a navigational panacea and should not be thought of as an “easy” substitute to map and compass proficiency. A directional “backup” of sorts, which in certain situations can be worth its weight in gold. For example, in trail-less, snow-covered terrain, when visibility is limited and there is not much in the way of distinctive landmarks, a GPS can pinpoint our exact location. A handy bit of information to have when the weather has turned nasty, and daylight is fading fast.
|
While hiking a familiar trail in the coastal mountains of BC in early season, the snow cover made it impossible to spot the trail and many of the trail markers. Our group had a handheld GSP, and it was being used regularly to keep us on track. The weather was cloudy and grey, the ground white with snow. We met two men. It was evident they were lost, one was panicky, the other angry. When they spotted us, they both ran to us for help. We were able to give them some bearings. Even on a familiar trail when the weather turns it is easy to get lost!
|
Many well supported trail organisations will offer an App for smartphones that has a GPS capability. As a back-up we also carry a topographical trail map and compass when leaving on an extended trip in the wilderness.
For safety support, having an individual at home, with our itinerary and time of return is important. We contact them regularly to inform them of our progress. If, for some reason, we cannot get out, or call our safety contact at a pre-set time, they have instructions on who to call to extract us from our situation.
An INReach or SPOT can play a key role. They are GPS tracking devices that uses satellite networks to provide text messaging and GPS tracking (depending on the subscription type purchased). These devices enable communication with family and friends via a text message, or getting out on our own, or need SOS assistance.
It is important to remember that, in most cases, if a hiker needs to be rescued, he or she will pay the expense of the rescue team (unless they have a subscription package). This may be tens of thousands of dollars. This sobering thought should alert a novice hiker to learn the important skills needed for a difficult wilderness trek prior to leaving home!
Navigation - Practical Skills
Orienteering - When ambling along manicured trails, with the sun shining, the only skill we probably require is the ability to locate a good campsite. On the other hand, when conditions turn nasty and the path ahead is anything but clear, our comfort and more importantly our safety may ultimately depend upon our ability to navigate. Whether we carry a GPS or not, the ability to interpret a map and navigate with a compass are fundamental backcountry skills that every serious hiker should know.
Orienteering - When ambling along manicured trails, with the sun shining, the only skill we probably require is the ability to locate a good campsite. On the other hand, when conditions turn nasty and the path ahead is anything but clear, our comfort and more importantly our safety may ultimately depend upon our ability to navigate. Whether we carry a GPS or not, the ability to interpret a map and navigate with a compass are fundamental backcountry skills that every serious hiker should know.
|
The key to proficiency in navigating is paying attention. Establishing the habit of keeping track of where we are means regularly correlating what we see on the map with what we see on the ground. Observe the movement of the sun, look for landmarks, and note our walking pace.
We were trying not to trip up on the rough terrain. Looking down, we missed an intersection on the trail and headed down into a canyon. After about an hour, Simon realised that the sun was not where it should be. We were heading in the wrong direction. We turned around and walked back to the missed intersection. We had lost two hours with this mistake.
The map and compass should always be in an easy to reach backpack pocket. A topographic map does more than just show us how to get from A to B. It enables the hiker to form a mental picture of the terrain which he or she will be traversing. Before each hiking day, look at the map and visualize the proposed route. Pay attention to the landmarks: rivers, valleys, ridges, peaks, cliffs, buttes, gullies, contour lines.
|
When disoriented, never rush. If in doubt, take a moment, and study the map and surroundings. High points are ideal to get our bearings; however, they are not always there when we need them. Do not set off again until things have become clearer. It is better to spend five minutes obtaining our bearings, than an hour going in the wrong direction. If you are not sure of our location and the day is ending, it is best to set up camp. Things always seem clearer in the morning after a good night’s sleep. The weather may have changed, or details we missed due to exhaustion or stress are now more evident.
We were hiking in the Rockies. We crossed over into another valley, bush-waking without a trail. The weather turned bad and we became disoriented. We set up camp for the night. In the morning, we quickly found the trail we had searched for, for hours, the night before.
Make a mental note of the time when reaching an easily distinguishable landmark (e.g., trail junctions, lakes, passes, summits, river crossings, etc.). If you happen to lose your way, this information can prove helpful in getting back on track.
Pace is perhaps the most underestimated aspect of navigation. If you are lost, having an idea of what speed you walk, in all types of terrain, and conditions can prove vital in calculating the approximate distance covered since your last “known” location. When we find ourselves hiking in different types of environments, we make note of our average kilometrage (mileage).
Regardless of our navigational proficiency, there are times when we take a wrong turn. In such scenarios, the key is being able to recognize our error sooner rather than later. We look at each situation as an objective observer, rather than a subjective participant.
Here are the key points to remember when bearings are lost:
- Stay Calm - Panicking and making rushed decisions will only make a bad situation worse.
- Stay Put - Do not walk any further until an assessment is made of the current position.
- Formulate a Plan - Looking at the map, ascertain your position. Discuss when and where was the last time you were certain of your location. Quite often becoming “un-lost” is simply a matter retracing your steps. Consider the terrain you have covered, the approximate pace at which you have been walking and any landmarks that you may have seen since your last “known” location. If available, climb to the nearest high point to gain a lay of the land. Using your map and compass, identify any landmarks which may help in figuring out your location.
Repair Kit, Electronics, and Illumination
These items are grouped together for efficiency. As with the first aid kit, keep in mind that you need just enough to get out of a bind and back to the nearest community. It is a wonder what you can do with a bit of duct tape and some cord!
Repair Kit - At some point a piece of gear will need repair. With these few items, you can temporarily fix a puncture, a loose or broken pole, or fabric tears. Being prepared for small gear emergencies can keep you safe and on the trail. The trekking group can share the load of these items.
Electronics - Being on the trail is a time to disconnect. But our smart phones have become a multi-tool that most hikers depend on. Downloading the trail App and a logbook for the trail will make the phone our GPS system and our information center. It has also become our camera, music, and game repository. It is generally the go-to electronic tool.
Keep in mind that in remote wilderness areas and in some urban (international or remote) areas cell coverage can be spotty to non-existent. Having a redundancy for navigation is important.
These items are grouped together for efficiency. As with the first aid kit, keep in mind that you need just enough to get out of a bind and back to the nearest community. It is a wonder what you can do with a bit of duct tape and some cord!
Repair Kit - At some point a piece of gear will need repair. With these few items, you can temporarily fix a puncture, a loose or broken pole, or fabric tears. Being prepared for small gear emergencies can keep you safe and on the trail. The trekking group can share the load of these items.
- Repair/duct tape (2m on water bottle or trekking poles= 20 g)
- Knife or multi-tool (from cook set= 75 g-215 g)
- Scissors (12 g)
- Thin utility cord (15m= 50 g)
- Safety pins (5 g)
- Sewing repair kit (needle and thread= 5 g)
- Mattress/tent-repair patch kit (10 g)
Electronics - Being on the trail is a time to disconnect. But our smart phones have become a multi-tool that most hikers depend on. Downloading the trail App and a logbook for the trail will make the phone our GPS system and our information center. It has also become our camera, music, and game repository. It is generally the go-to electronic tool.
Keep in mind that in remote wilderness areas and in some urban (international or remote) areas cell coverage can be spotty to non-existent. Having a redundancy for navigation is important.
|
Walking in the Maritime Provinces, on the Trans Canada Trail, we encountered quite a few areas where there was no cell coverage. As well, on the AZT, on the edge of Tucson, our cellular provider did not offer coverage near this massive urban area!
To save on batteries in the wilderness, we typically leave our phones on Airplane Mode. When we enter a community, we will look for a restaurant, or store where we can recharge our phones, and the battery pack(s). The battery packs usually hold a few charges.
|
Illumination - Having a headlamp (100 g) is useful when we start our walking day early or need to go out and investigate something at night. There are many designs on the market. Make sure to research the best torches and select a lightweight, adjustable, and long-lasting model. Always start a new trek with fresh batteries or fully charged if USB chargeable.
First Aid Kit and Toiletries
Here is another area where one could shave some weight. Remember that enough supplies are needed to get out of a bind and back to the nearest community. On guided treks, the guide should have wilderness first aid skills and a good kit. They are responsible for the well being of their participants. It is a good idea to ask those specific questions prior to booking with a guiding company. All that is required by the trekkers are some basic toiletries and their prescription medication.
Here is another area where one could shave some weight. Remember that enough supplies are needed to get out of a bind and back to the nearest community. On guided treks, the guide should have wilderness first aid skills and a good kit. They are responsible for the well being of their participants. It is a good idea to ask those specific questions prior to booking with a guiding company. All that is required by the trekkers are some basic toiletries and their prescription medication.
In the coastal mountains of BC, we met an injured cyclist (broken collar bone and concussion). His guide was wearing full armour, but the client only wore a city bike helmet. The guide also had no first aid kit or knowledge of how to deal with the client’s injuries. Luckily, Julie assisted the injured cyclist, with our kit. The cyclist was carried out of the trail and Julie gave the guide a good talking to!
On hostel treks, you typically cross communities each day. A first aid kit can be quite basic for these adventures. The trekker may elect to bring a few more toiletries, their prescriptions, and some over the counter drugs that work well.
When considering wilderness thru-hikes, there may be a need for more items in a first aid kit conversely, you generally decide to carry less toiletries. We strongly recommend taking a wilderness first aid course prior to tackling a long-distance wilderness journey. If the plan is to thru-hike with a group, make sure at least one individual has first aid knowledge.
Take the time to prepare the kit for the trekking party’s safety. First aid kits may be basic or comprehensive. What is needed depends on the medical training of the individual(s) and the distance/time away from professional medical help. Ready-made first aid kits are commercially available from outdoor retailers, but it is easy to make smart, inexpensive first aid kits ourselves.
The following is a sample of items to consider when creating the first aid kit. The amount of each item can be small, or travel size. Consider storing items in categories in Ziplock bags for quick access and cleanliness.
In addition to personal prescriptions, the kit could contain items to help alleviate the common symptoms such as these:
When considering wilderness thru-hikes, there may be a need for more items in a first aid kit conversely, you generally decide to carry less toiletries. We strongly recommend taking a wilderness first aid course prior to tackling a long-distance wilderness journey. If the plan is to thru-hike with a group, make sure at least one individual has first aid knowledge.
Take the time to prepare the kit for the trekking party’s safety. First aid kits may be basic or comprehensive. What is needed depends on the medical training of the individual(s) and the distance/time away from professional medical help. Ready-made first aid kits are commercially available from outdoor retailers, but it is easy to make smart, inexpensive first aid kits ourselves.
The following is a sample of items to consider when creating the first aid kit. The amount of each item can be small, or travel size. Consider storing items in categories in Ziplock bags for quick access and cleanliness.
- Sanitisation
- Antiseptic hand sanitizer (59ml= 67 g)
- Plastic non-latex gloves (2 pairs= 20 g)
- Antiseptic wipes, and or antibiotic ointment (6 pack= 5 g)
- Abrasions, blisters, burns, and cuts:
- A small roll sterile gauze (1m= 10 g)
- Adhesive tape (0.5m= 10 g)
- Band-Aids in several sizes (12=20 g)
- Steri-strips (5= 2 g)
- Tools:
- Tweezers (6 g)
- Nail clippers (40 g)
- Tic removal device and/or oil of peppermint (9+45= 54 g)
- Sprains and strains:
- Elastic bandage (45 g)
- An emergency foil blanket (45 g)
- Medication and creams:
- Anti-itch cream (20 g)
- Anti-Chaff balm (20 g)
In addition to personal prescriptions, the kit could contain items to help alleviate the common symptoms such as these:
- Allergies, cough, congestion, and fever (10 pack= 10 g)
- Digestive distress: gas, bloating, and diarrhea (10 pack= 10 g)
- Muscular pain and headaches (bottle of 10= 15 g)
Toiletries - Let us be a blunt. Distance walking is an endurance sport that will last for weeks, or months. We save on carry weight by wearing the same clothing every day. We will not wash regularly. Part of the experience is being one with sweat and body odor. There are some basics on how to remain somewhat clean but expect to stink.
To shave carry weight chose small travel sized items. Some hikers cut the toothbrush and hairbrush handles to shave more weight. The camp soap can be used safely for the cooking pot, clothing, body, and hair. No need to bring shampoo and body soap. Bugs and animals love sweet smelling creams, so leave hand and body lotions at home. Sweating all day cannot be eliminated by an antiperspirant, do not bring any.
Carry only the very basics.
Women will need a few more items. Feminine products are important but remember the carry it out etiquette. Chose washable pads, or the menstrual cup. They require rinsing but are reusable. Remember to rinse them in clean water, away from water sources and, away from campsites to minimise attracting animals.
To shave carry weight chose small travel sized items. Some hikers cut the toothbrush and hairbrush handles to shave more weight. The camp soap can be used safely for the cooking pot, clothing, body, and hair. No need to bring shampoo and body soap. Bugs and animals love sweet smelling creams, so leave hand and body lotions at home. Sweating all day cannot be eliminated by an antiperspirant, do not bring any.
Carry only the very basics.
- Travel size toothbrush and toothpaste/powder/tabs (24+32= 56 g)
- Hairbrush and elastics for long hair (26 g)
- Camp biodegradable soap, or powdered soap (120ml= 165 g)
- Bandana and/or camp towel (80 g)
- Toilet paper and trowel (115+17= 132 g)
- Wet-Wipes (desert environment -optional) (12-pack= 80 g)
- Sunscreen cream, and/or lip balm (40+15= 55 g)
Women will need a few more items. Feminine products are important but remember the carry it out etiquette. Chose washable pads, or the menstrual cup. They require rinsing but are reusable. Remember to rinse them in clean water, away from water sources and, away from campsites to minimise attracting animals.
First Aid Kit and Toiletries - Practical Skills
Cleanliness Habits - Keep long hair tied back. When it gets oily it will be less noticeable. When access to water is plentiful a quick rinse helps refresh our bodies. Remember not to use soap directly in the water source. We use a bandana to wipe sweat off faces, and to wash. Once it is well soaked, move away from the water source, and give important areas a bit of a wash. In very dry environments, having wet-wipes can do wonders to refresh our bodies after a long hot day.
Another item worth considering for women hikers, is the pee rag. Women’s bodies tend to hold moisture after voiding which will quickly lead to smells. Using a washable pee rag for drying after urination eliminates this issue and saves toilet paper. Hang the rag outside the pack to dry between uses. When access to water is plentiful, give it a wash with a drop of camp soap (away from the water source please). Julie ties hers on the outside of the tent for nighttime use. If it rains, nature washes the rag for her!
Always dig a hole for bowel movements. Burry the feces deep enough not to be found by curious animals. Toilet paper can be burnt or carried out in a Ziplock bag. The trowel can be a useful tool to dig the hole in harder ground. We use hand sanitizer to disinfect our hands after a nature call. This reduces possible fecal contamination.
Blister Care - Blisters are small, fluid-filled bubbles that can form on the outer layers of our skin. They are our body’s way of protecting damaged skin, so it is usually best to leave them alone. Blisters are wounds that take time to heal. However, there are steps that help reduce the pain.
Most blisters are the result of friction. They form when something rubs up against our skin, like an ill-fitting shoe. Other possible causes of blisters include:
Under no circumstances should the following blisters be drained. This may lead to the spread of an allergic reaction or infection.
Most blisters heal on their own within a few days. The liquid-filled bubble of skin is a natural form of protection that helps shield the wound from harmful bacteria. Blisters also provide a safe space for new skin to grow. It is best to leave them alone when possible.
Some blisters may need a little extra protection to keep them from popping. A blister on the back of the heel, for example, might pop from the pressure of our shoes. In addition to causing a lot of pain, this can also increase the amount of time it takes for the blister to heal.
While it is best to leave blisters alone, sometimes it needs to be drained, especially if they are large or in an inconvenient place.
The goal is to drain the fluid without damaging the skin covering the blister. When choosing to drain a blister, try to do it within twenty-four hours of it forming. Follow these steps to safely drain a blister and minimize the risk of infection:
Whether drained or not, blisters are prone to infection. Untreated infections can be painful and require seeing a doctor for a dose of antibiotics. In addition, some blisters are caused by something more serious than friction. Call you doctor if:
Blisters may seem unavoidable, but there are steps that can be taken to prevent them:
Cleanliness Habits - Keep long hair tied back. When it gets oily it will be less noticeable. When access to water is plentiful a quick rinse helps refresh our bodies. Remember not to use soap directly in the water source. We use a bandana to wipe sweat off faces, and to wash. Once it is well soaked, move away from the water source, and give important areas a bit of a wash. In very dry environments, having wet-wipes can do wonders to refresh our bodies after a long hot day.
Another item worth considering for women hikers, is the pee rag. Women’s bodies tend to hold moisture after voiding which will quickly lead to smells. Using a washable pee rag for drying after urination eliminates this issue and saves toilet paper. Hang the rag outside the pack to dry between uses. When access to water is plentiful, give it a wash with a drop of camp soap (away from the water source please). Julie ties hers on the outside of the tent for nighttime use. If it rains, nature washes the rag for her!
Always dig a hole for bowel movements. Burry the feces deep enough not to be found by curious animals. Toilet paper can be burnt or carried out in a Ziplock bag. The trowel can be a useful tool to dig the hole in harder ground. We use hand sanitizer to disinfect our hands after a nature call. This reduces possible fecal contamination.
Blister Care - Blisters are small, fluid-filled bubbles that can form on the outer layers of our skin. They are our body’s way of protecting damaged skin, so it is usually best to leave them alone. Blisters are wounds that take time to heal. However, there are steps that help reduce the pain.
Most blisters are the result of friction. They form when something rubs up against our skin, like an ill-fitting shoe. Other possible causes of blisters include:
- burns
- sunburns
- frostbite
- eczema
Under no circumstances should the following blisters be drained. This may lead to the spread of an allergic reaction or infection.
- allergic reactions
- exposure to poison ivy, oak, or sumac
- viral infections, such as herpes, shingles, or chickenpox
- bacterial infections
Most blisters heal on their own within a few days. The liquid-filled bubble of skin is a natural form of protection that helps shield the wound from harmful bacteria. Blisters also provide a safe space for new skin to grow. It is best to leave them alone when possible.
Some blisters may need a little extra protection to keep them from popping. A blister on the back of the heel, for example, might pop from the pressure of our shoes. In addition to causing a lot of pain, this can also increase the amount of time it takes for the blister to heal.
- Cover it up. Cover the blister with a loosely wrapped bandage. A regular adhesive bandage or some gauze secured with tape can be used. The blister needs air to help it dry out, so keep the middle of the bandage slightly raised for airflow.
- Cushion it. Using a cushioned adhesive bandage specifically designed for blisters may be useful. It can keep out bacteria and reduce pain while the blister heals.
- Pad it. Avoid putting pressure on the blister by cutting out a doughnut-shaped piece of moleskin. Moleskin has thick cotton padding that can absorb pressure. Be sure to cover the padding with a regular bandage to keep out bacteria.
While it is best to leave blisters alone, sometimes it needs to be drained, especially if they are large or in an inconvenient place.
The goal is to drain the fluid without damaging the skin covering the blister. When choosing to drain a blister, try to do it within twenty-four hours of it forming. Follow these steps to safely drain a blister and minimize the risk of infection:
- Wash hands and the blister. Wash hands with soap and warm water or hand sanitizer. Clean the surface of the blister thoroughly with alcohol, iodine, or an antiseptic wash.
- Disinfect a needle and thread with alcohol. Dip a needle (and thread) in rubbing alcohol to disinfect it or wipe it thoroughly with an antiseptic wipe.
- Carefully puncture the blister. The use of a threaded needle to puncture the blister can be a good way to keep the blister draining. Pass the threaded needle through the first hole and exit on the opposite side of the blister. Leave the thread in the blister with some thread extending beyond the blister on both sides. The blister fluids will wick out by the thread.
- Cover the blister with ointment. Apply an ointment, such as petroleum jelly, or antiseptic ointment to the blister.
- Apply a dressing. Cover the blister with a bandage or gauze.
- Repeat. Blisters tend to fill back up quickly. This process may need to be performed every eight hours for the first twenty-four hours. After that, change the dressing and apply ointment daily.
Whether drained or not, blisters are prone to infection. Untreated infections can be painful and require seeing a doctor for a dose of antibiotics. In addition, some blisters are caused by something more serious than friction. Call you doctor if:
- The blister fills with yellow or green pus.
- The area is red, inflamed, or hot to the touch.
- The pain gets worse instead of better.
- The blisters are in unusual places, such as your mouth or eyes.
- The blister keeps coming back.
- They are accompanied with other symptoms such as an allergic reaction.
Blisters may seem unavoidable, but there are steps that can be taken to prevent them:
- Wear moisture-wicking socks instead of cotton ones to reduce moisture.
- Use a foot powder or anti-chaffing balm to reduce moisture and friction.
- Try wearing two pairs of socks to redistribute friction.
- Avoid wearing shoes that are ill fitting, too big or, too small.
- Stop at the first sign of a hot spot and address the area prior to developing a full blister.
Miscellaneous
This last section is a catch all for those small items. Their size does not mean they are not important though. Some are necessities such as identification and permits, while others are luxuries such as a deck of cards. Spend a bit of time reviewing the trail knowledge for the selected trail to form an understanding of which of the following are required.
Identification
It is a good idea to have a trusted friend or family member have a scanned image of the important papers in case they are lost or stolen. In a pinch they can e-mail copies of the documents back to you.
Small denomination cash may come in handy in small/remote communities, and to pay for park permits, or hostel stays. Have some cash hidden somewhere in the backpack. Do the research to avoid being caught having to go and find a bank!
When travelling in other provinces, states, or abroad it may be wise to purchase travel medical insurance. A stay in a foreign hospital can be expensive. If injured, travel plans may need to be changed and this can be costly.
Permits, Visas - Some of these documents can be purchased prior to leaving for the trail, while others will need to be picked up at the park’s ranger station, or upon entering a country.
Luxuries
This last section is a catch all for those small items. Their size does not mean they are not important though. Some are necessities such as identification and permits, while others are luxuries such as a deck of cards. Spend a bit of time reviewing the trail knowledge for the selected trail to form an understanding of which of the following are required.
Identification
- Passport, driver’s licence, or identity card
- Credit card, cash
- Travel medical insurance, provincial or state medical insurance
It is a good idea to have a trusted friend or family member have a scanned image of the important papers in case they are lost or stolen. In a pinch they can e-mail copies of the documents back to you.
Small denomination cash may come in handy in small/remote communities, and to pay for park permits, or hostel stays. Have some cash hidden somewhere in the backpack. Do the research to avoid being caught having to go and find a bank!
When travelling in other provinces, states, or abroad it may be wise to purchase travel medical insurance. A stay in a foreign hospital can be expensive. If injured, travel plans may need to be changed and this can be costly.
Permits, Visas - Some of these documents can be purchased prior to leaving for the trail, while others will need to be picked up at the park’s ranger station, or upon entering a country.
Luxuries
- Diary and pen (60 g)
- Playing cards (90 g)
- Book, e-book
|
Having a small notebook and a pen may come in handy. Writing about our treks can help us remember names of fellow travelers, names of communities, and other interesting anecdotes.
We are card players and can spend many hours in our tent playing card games. We keep track of wins in our diary for gloating privileges. We know many hikers that bring reading material, either in the form of a book, or e-book. We never have. We prefer to play card games. Consider how resting time will be spent, are these items worth their weight? |

